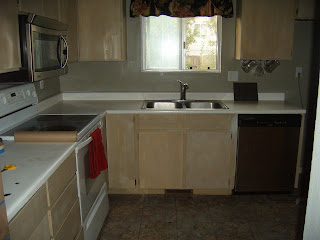
Showing posts with label project. Show all posts

Tuesday, September 28, 2010

project: Curtains

I found a fabulous deal on fabric so I revamped the "nursery" curtains.

Before:

After:

Simple rod pocket curtains that say GIRL! I don't mind switching them out if our next placement is a boy. Check out the cost breakdown.

Cost Breakdown
Fabric $12

Sunday, August 29, 2010

project: Stripes

Well, Cinderella will probably be leaving this week. She's a timid little girl and keeps to herself. BUT when the rare thing gets her excited she SQUEALS and flashes a full smile.

I finished the stripes just hours before Cinderella came.
Before
During
After


Cost break down:

$4 for frog tape.
Laser Level- We had hiding in the basement
Paint- left over SW paint pot from some random project

Total: $4

Saturday, August 21, 2010

Project: Stripes?

I'm thinking about adding some stripes to my house. Specifically horizontal stripes to one wall in my front room. Maybe some down the hallway too. Here's some inspiration.

Tuesday, August 03, 2010

project: SO MANY PROJECTS

We got a call late yesterday afternoon that sent us scrabbling. 6 kids were coming into care at 10:00 this morning and they needed somewhere to land. I spent the remainder of the afternoon and evening calling for bunk beds, calling for benches (so we could squeeze 8 around our 4 person table), making grocery lists, worrying about car arrangements, and so on. Today, after their court hearing, the Judge gave the parents 3 more weeks to work on things WITHOUT taking the kids into custody.

Big exhale....

3 weeks to iron out the details of our lives before the possibility comes up again. This call brought to the forefront all of the projects I've been ignoring while we get out of debt. Parts of our house are a disaster. BIG. EMBARRASSING. DISASTERS. Things that could not be ignored if our house swelled to 8. Things like: the broken dishwasher, the leaking pipe under the sink in the basement bathroom, the missing tiles in the up stairs bathroom, the BACKYARD JUNGLE, and the list goes on and on and on. So my question is, can I tackle any of these with a couple of twenties? Any resources about plumbing, replacing sub floors, drywalling, tiling, etc that you have found helpful? Things I, E, can do myself - cause, let's face it, J is way too busy to help me figure these things out. AND projects that take no more then $50. Is this POSSIBLE?

Saturday, July 31, 2010

project: Free Table

I found this table for FREE in the online classifieds. HURRAY!


A quick coat of red spay paint and it's sittin' pretty in my kitchen.


Monday, July 19, 2010

project: Bed Makeover

J found this headboard and foot board on KSL this winter. We had the girls with us and they were MAD when we went to look at it. After a QUICK look we decided to go for it and handed over our $20. You can't tell in our bad cell phone photos but it was pretty beat up. Here's the transformation


Primer

Krylon Bauhaus Gold. With black glaze. This was not pretty and not our style. WAY too orange.


Rustoleum Strawflower nice soft buttery yellow.


Sunday, July 04, 2010

project: Bedroom

Well, I promised I wouldn't share any more bad cell phone pictures, but our good friend Anna couldn't wait. So here's our new, to us, bedroom.


I painted the walls Puritan Gray by Benjamin Moore, and our $20 headboard and foot board Strawflower by Rustoleum. I also hung our revamped nightstands above the bed for storage.


I found a chandelier perusing the free section of the classifieds and painted it black. Along with some $12 shades from JC Penny it works nicely above our bed. I LOVE our black and white "black out" curtains. They were a must have with the twins!


(I THINK the weird shadows on the walls are coming from the chandelier)

Last spring I painted our dresser black. I pulled the chair from the basement. Although, I'm thinking I may try to finish this one and put it up here instead. Unfortunately we couldn't squeeze a new TV into the budget, so we mounted a computer monitor and use a laptop to watch movies.

We're not done. I need to cover the cords, touch up paint, and find some fun art for the walls. Our room is small and cozy but for less then $100 I'm pretty happy with it.

Monday, June 21, 2010

project: Empty Space Utilized

My house does not lend itself to a mud room and I have grieved that loss the 4 years we've lived here. I told my friend Wednesday that I wanted to put some hooks behind my front door to hang my crap stuff. Stuff like a purse, maybe a cute coat or two, or a church bag. The kids rooms have hooks for those things already, so this would be just for me. I've seen board and batten done here and knew I wanted to use that. Check out these other cute ladies who had the same thought process.


Recaptured Charm


Both used a small space of wall between doors to make a mudroom type space. I'm in LOVE!

Knowing what to do I started right away. I used graph paper printed from here to sketch my ideas and triple check my math.

Then we headed off to Home Depot. I found my wood (Primed MDF) and pushed the button for the guy to come make 8 cuts for me. While I'm waiting, what to my wondering eye should appear? THE CUT DISCARD PILE! A few seconds of searching and I found pieces that could be used for my vertical strips. COST $.50 for all my vertical pieces, TOTAL! I'm walking out of there spending only $6.00 ($5.50 of that for my horizontal pieces) and I'm soaring on my fabulous deal. I get home and PANIC! All of the sudden I worry that my vertical pieces are too BIG. But, hey, for $.50 I have to make it work, right?????

I primed and painted the wall and my pieces of discarded $.50 MDF.

I attached the MDF to the wall using liquid nails, a couple finishing nails and blue painters tape. I let that dry (or is the proper word cure?) for 24 hours.

(I know bad cell phone pictures, SORRY!)

Caulked ($2) and put on my final coat of paint Saturday.

I headed out for IKEA knowing they have the best price for wall hooks. The AS IS section had a grouping of 5 hooks for $2.99 TOTAL. Bringing my final bill for this project to $11


DID I MENTION LOVE!

Friday, June 18, 2010

project: Hard Water Stains

Ok so I have to tell you the best secret to window washing in Utah. We have hard water and my windows were all gunked up from the sprinklers hitting them. They were filmy and BAD. This spring I saw somewhere (maybe STUDIO 5?) to put jet dry, liquid dish soap and vinegar together in a squirt bottle and go at it. IT IS FABULOUS! I've used vinegar alone before but it never got the hard water stains off. This mixture is the BOMB. Plus, the jet dry works like it does in your dishwasher and the water just sheets off you windows. You want my version of the recipe? Here it is!

1 TBS liquid dish soap
4 TBS Vinegar
1 TSP Jet Dry or equivalent product
1 Liter of water

You may need to adjust the amounts to your needs.

Dump it all in a squirt bottle shake it up and start washing.

Friday, June 11, 2010

poject: MORE Inspiration

Well, my bedroom is mostly done. You wanna see it? I wanna show it to you. BUT J says I can't post cell phone pictures anymore, and I think he might be right. SOOOO until I can get a camera I'll just have to show you some more inspiration.

I didn't jump on the bird band wagon right away. Actually I didn't like the bird trend AT ALL, until the trend included bird cages. I've always loved bird cages. Now I want some cute little birdies for my bedroom with or without cages. I saw these in my Ballard Catalog. My favorite is the little baby birdie at the bottom. Isn't he soooo CUTE?!


Saturday, June 05, 2010

Project: Box Shelves

House to Home


Have you seen this post by Apartment Therapy almost a year ago? LOVE it! I think I'm obsessed with box shelves.

I decided I had to have some and started looking online. Wow these puppies are EXPENSIVE! J suggested we modified our current nightstands. GENIUS!

Do you remember going off to collage and buying these babies?

Image from KMART

Yeah we still have ours. I scrubbed them up, took out the shelves and added one to the end. Made sure to paint the unsightly particle board. I can't wait to see them over our bed!

Wednesday, June 02, 2010

projects: Inspiration

I've been inspired-AND that means lots of work for my husband.


I really LOVE Jane Lockheart on HGTV. And this was my first bedroom inspiration. I LOVE the color on the wall-

Benjamin Moore Puritan Gray.

I had it mixed at Home Depot this weekend making the gallon just over $15 rather than the $40 at ACE.


And this was my second inspiration - found at ALL THINGS THRIFTY.

LOVE the yellow on the furniture.

Hopefully this will all come together this weekend and you can see what I've been working on!

Wednesday, May 05, 2010

project: The Good, The Bad, and The Ugly

Yesterday I had a much needed long talk with my mom. Afterwards I actually got something done. I did 4 loads of current dirty laundry and folded 5 loads of clean clothes abandoned on the basement couch during our Little Boy and Little Girl days. Now my living room looks like this


Lisa did say "the good, the bad, and the UGLY!"

Tuesday, September 01, 2009

project: Alternative Paint for Counters

Sooo If you don't like the look of mine but still what to do your counters I recently found this site. I think it may be a good option!

Sunday, August 30, 2009

project: Counters Done!

Ok sooo I DID IT! I refinished my counter tops (doesn't that sound better then "I painted my counter tops"?). Over all I am REALLY pleased. I mean it couldn't be worse then this? Right?


Here's the new and improved product.


I learned a lot and if I were doing it over again I would do several things differently. Here's my story.

Materials

1 roll Painters tape
1 roll Painter's paper
Caulk
5 cans Black Metallic Spray Paint
1 can Black Metallic Spray Paint
2 Gallons EnviorTex Lite (40% off 1 item at Roberts so make 2 trips)
1 Propane Torch (for bubbles in EnviorTex).

My Process

1. I spent a lot of time researching the look I wanted. I always thought I wanted absolute black granite in my kitchen so when I was looking at faux finishing my counters that is the look I gravitated towards. I practiced with a number of spray paints on old pieces of cardboard until I made a decision.

2. I found that I'd have to special order the paint I wanted so I did that 10 days in advance. (Rustoleum Black Granite)

3. I really cleaned my counters. I used TSP and a scrub brush. Did you notice how nasty they were AFTER a good, hard cleaning? I took the time to fix some problems and Oh BOY am I glad I did. I had some large chips missing that that I filled in with drywall compound, and multiple cracks I caulked. Make sure you follow manufactures dry times.

4. Tape Tape Tape. Tape everything. If you use spray paint tape off your floors, your cabinets, your back splash, your entries into the room. I failed to do that last part and I found dust particles in the basement. EVERYTHING in my house needed a good cleaning. Do a good job taping because the EnviroTex is an oooie gooie mess and will seep through everything. Notice how I taped off the sink using a black garbage bag. I should have taken a picture before I started painting. =)

5. I painted 2 base coats of Rustoleum's Black Metallic paint. It's sparkles and is so pretty. I let my counters dry over night. I mentioned I would do some things over. I would have primed the counters with dark primer so I could use less spray paint. Not only would that have been cheaper it would have saved my finger a lot of pain.


6. Next spray lightly the Black Granite Stone paint. I held it up about 12 inches and just did little spurts. I only used half a can on my 15 linear feet of counters. (that was one expensive half can see here.) I let that dry for 4 hours.


7. My downfall, EnviroTex. It's a good product I am just inexperienced and impatient. I followed instructions and mixed well then I poured liberally onto my counters. Again following instructions I smoothed it out and let it self level. It works GREAT on flat surfaces. Unfortunately, I have a "back splash" built into my counters. Getting the EnviroTex to cover my back splash and my edges was not easy. A lot of it ended up on the floor and I had to use LOTS of rubbing alcohol and a dish scraper to get it up.


Also I didn't have enough EnviroTex and had to run to the store at the last minute. Not fun and my counter by the fridge is not pretty. (I'll sand and redo it later, much later.) I didn't use a knife to remove some tape and.... Notice the white spot on the counter.


8. As it's setting up make sure you use the torch to get out bubbles. NEVER leave the torch in one place for long. I'll get little "pot holes" or divots in you finish. So just keep it moving and on low flame.

Over all I'm pleased. and I would recommend you do it if you dislike your counters. The final total... $200. $130 of that is EnviroTex (3 gallons, including the one I'll use to fix my screw ups) and $35 is my 6 cans of special order paint (of which I only used 1/2 can).
Lean From My Mistakes
1. Make sure you have enough EnviroTex. Get 1 gallon more than you think you’ll use. ( you can always return it)
2. Take the tape off as soon as it gels enough to stop dripping.
3.Use a square painter’s sponge on the back splash. I didn’t and I wish I had.
4.Tape Tape Tape Tape. Tape off EVERYTHING well.

5.Wear rubber gloves and have a back up pair, or 2, if you have to take them off before you’re done (you know, bathroom, kids, going to the store for EnviroTex).
6.We used a Sheet on our floor. It has always been our drop cloth. Use something heavier. The EnvrioTex seeped right through it and attached to our floor.

7.Have Lots of rubbing alcohol available for drips on floors cabinets or sinks.

8.If you have a bathroom vanity, practice there first. I wish I had.
Good Luck and contact me if you have any questions!

Thursday, August 06, 2009

problem

Does anyone else want to do their counters with me. I'm set on this black granite look from Rustoleum. The problem is I'd have to special order it. It comes in cases of 6 and my tiny kitchen will only need 1 or 2 cans. I'd love to split the cost with you if you wanna. We're coming to Oregon for Thanksgiving so don't let distance stop you!

Update: It's 7 something a can. For all six it'll be $42+.

To achieve this look I plan on the following:

1. Clean counters with TSP
2. 2 coats of KILZ primer
3. 2 coats of black paint
4. LIGHTLY spray spray paint on
5. After completely dry use 2 boxes of EnviroTex Lite to smooth and seal ($20 a 1/2 galon after 40% off at Roberts)
6. Use small propane torch to get rid of bubbles

Planning on not using my kitchen counters for 4 days.

I have the kilz and black paint from past projects. so for me to do this project it'll cost about $65 including 2 cans of spray paint. (I'm hoping to borrow the torch.)

Sunday, August 02, 2009

craft: Counters!

So I'm doing this. She also did it. This is where they learned how. I'm thinking I'll do it in the next 2 weeks. It can't turn out worse then I already have, can it? No. I'm totally inspired and I CAN do this. RIGHT?????

Wednesday, June 10, 2009

project: ottoman

I finally finished the ottoman just after the kids came. It was super easy and for the price tag I love it! I finally found the fabric at Home Fabrics.

1. Frist I laid the fabric over the ottoman right side in towards the ottoman

2. I pinned out my seams. I didn't cut anything. I just pinned the fabric together so it hugged the ottoman closely. I ended up with triangles of excess fabric emanating form the ottoman like spokes. No measuring.

3. Using the sewing machine I sewed along my seams

4. Now you cut out the extra fabric so it has a nice smooth appearance.

5. Using a staple gun, staple to the underside frame working one staple at a time. Alternate sides of the ottoman with each staple. If it was a compass you'd go North then south east then west rotate and repeat.

Here's our finished product.


It's not perfect. It has a little bit of an octogon shape on the top where the seams show. If I were a better seamstress I'd have done a better job on that part. Total project cost, including the ottoman and fabric was under $100.

Saturday, March 14, 2009

project: Landscape Class

I've been taking a landscape class through UVU Community Education. It's been a great class and I've learned alot about lawn care, plants, fertilizer, landscape design and much much more! I think for me the best part has been gaining a little bit of confidence. Knowledge coupled with great resources really empowers me and gets me excited to experiment. Last week the instructor looked at our house (including our dreamings for our house) and gave me a customized plan to get started with. I really like the initial plan and I am so grateful that he would take the time to do this for everyone in the class. Today I'm looking for plants that will fit into the plan. Some of the things I'm looking for are large shrubs, an apple tree, and a focal point for the backyard. Here's a bad scan of the plans. Our house sits right in the middle facing the bottom. Our driveway is at the bottom right. The garage and back part of the house don't exist yet.

I'd recomend this class to anyone here in Utah County. It is a great opportunity to learn a lot for a little price tag!

Tuesday, March 03, 2009

project: Finished (Almost)

This is mainly for my mom. Every time I talk to her she asks me about currant and past projects. So Mom, here's our most recent completed projects! I can't wait for your feedback!

The 2nd kid bedroom

This one is intended for the older kids (if we get any). I want to thank everyone who helped us get this room together. Thank you so much for the bunk beds, toy storage, bookshelf, money donations, paint, time and effort that were so instrumental for us to get this room put together. Thank you!
I've found it hard to decorate for kids you don't know. This is not how I'd decorate a little girls room or a little boys room but this is my take on a generic kids room.

The bunk beds were given to us and the great number comforter are from IKEA along with the table, chairs and craft storage.

I want to fill these frames with cork board so it's easy to switch out kid art. If that really happens or not, remains to be seen but that's my current idea!

M, the little girl I watch, loves to color and paint in this room!


Nursery


We finally got the dresser painted while Mom and A where here this fall! Now, this is my favorite dresser.

We've been wanting to redo this chair.


I think the ottoman turned out AWESOME!


Basement Family Room/BYU Cougar Room!


Almost everything came from KSL (a local TV station that has free online classifieds).


I hate the shininess of the paint! I walked into the paint store I wanted eggshell and somehow walked out of there with semi-gloss! I'm trying to figure out if I want to try and do some sort of tone on tone paint treatment or just plain repaint it. You can tell on this last picture that the back half of the room is not painted.
Related Posts with Thumbnails